
Saturday, April 13, 2013
Team Picture
Going to Chai's for Dinner after a long day of work in the garage has been a motorsports tradition for many years now. Thanks to the Chai's team for making such great food for so long!


Sunday, February 17, 2013
Making Bodywork, Part 3
So yeah, I guess I owe the team (and the readers) a part three to the bodywork fabrication. Where we left off on part 2 was partway through sanding the first filler coat on the molds. After all the molds had filler applied and been sanded smooth, we did it again to fill in the little divots and imperfections that remained. The next step was to tape the molds with a layer of packing tape. We do this to preserve the molds so that they can be reused - just in case the release coatings don't work as well as they should.
Click through for the rest...
Next, we spray 3 coats of PVA on the molds as a release agent. PVA dissolves in water, so it's relatively easy to release the parts from the molds by apply water and force.

Finally, we can start layering the carbon fiber onto the molds. The process is pretty standard, but we have to make sure to lay up the top layer in a cosmetically pleasing fashion.
Then, apply epoxy, peel ply, vacuum bag, and off we go. We did 3 layers this time around for all the parts.

 Coming out of the vacuum bag, here's what the parts looked like:


 Still some sanding to do at this point - that's the problem with vacuum bags - they will scrunch up any extra material you leave, creating ridges/bumps. That's why you'd ideally have a female mold rather than the plugs we're using. Still, these are some of the better parts we've done straight out of our molds.
We also have to make all the cutouts in the pieces to make them fit over all the various things sticking out of our car. We have front wing cutouts, radiator support cutout, and the muffler support cutout. Finally, we can paint the pieces.


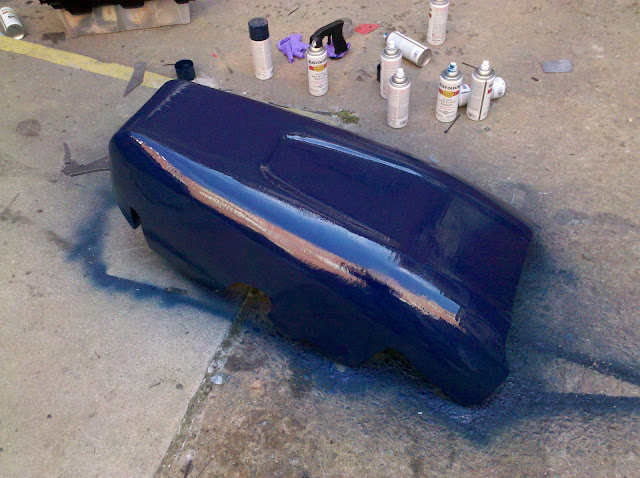
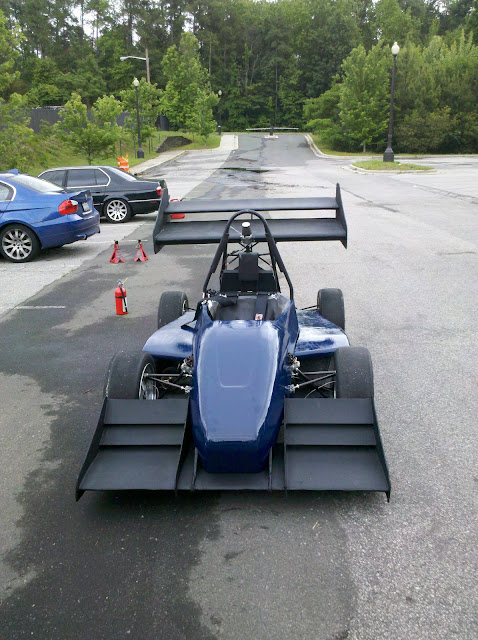
Of course, we have to attach the bodywork to the car too. We use Dzus fasteners most of the way around - and this year we've made use of industrial strength velcro to attach bodywork. The side panels are attached with Dzus fasteners across the top and velcro around bottom, the side pods attach to the side panels via Dzus fasteners on top and velcro around the bottom to the diffuser, and the nose cone attaches to the frame with one Dzus fastener on top and velcro to the front wing on the bottom (see the trend?). All those tabs had to be welded to the frame (I think right around here is when our TIG welder broke...)
And finally, the finished product before all those stickers go on.

 |
| JP Taping the nose cone |
 |
| Costi taping a sidepod |
Next, we spray 3 coats of PVA on the molds as a release agent. PVA dissolves in water, so it's relatively easy to release the parts from the molds by apply water and force.
Finally, we can start layering the carbon fiber onto the molds. The process is pretty standard, but we have to make sure to lay up the top layer in a cosmetically pleasing fashion.
 |
| Strategic cuts where you have small radii are important |
 |
| final layer |
We also have to make all the cutouts in the pieces to make them fit over all the various things sticking out of our car. We have front wing cutouts, radiator support cutout, and the muffler support cutout. Finally, we can paint the pieces.
 |
| Hard at work priming the bodywork |
 |
| Finally, Duke blue bodywork. |
Of course, we have to attach the bodywork to the car too. We use Dzus fasteners most of the way around - and this year we've made use of industrial strength velcro to attach bodywork. The side panels are attached with Dzus fasteners across the top and velcro around bottom, the side pods attach to the side panels via Dzus fasteners on top and velcro around the bottom to the diffuser, and the nose cone attaches to the frame with one Dzus fastener on top and velcro to the front wing on the bottom (see the trend?). All those tabs had to be welded to the frame (I think right around here is when our TIG welder broke...)
And finally, the finished product before all those stickers go on.
3D printed car
So at the end of the year last year we decided to print a model of our car with the 3D printer. Here is the result:
Because of the size of the model, things had to be beefed up so that they wouldn't snap. This was a really annoying and time consuming process honestly, but it was worth it.
 |
| The 10" printed FSAE car |
 |
| The STL version of our car- beefed up for scale |
Sunday, February 10, 2013
Jan-Mid February Update
We have been very busy at the Duke Motorsports garage, both on and off the car. Duke University recently had their spring semester TechConnect and Career Fair events, and we were lucky enough to have GM IT department come to the event. After lunch with some of the recruiters, we brought them down to the garage to show them last year's car and the progress we've made on this year's car. And of course, when given the opportunity to sit in a race car, who could resist? We want to thank them for their hospitality, and that we really enjoyed having them visit us!
We recently finished the engine mounts for the new frame, and everything is starting to come together for the car.
With the engine mounts in place, we can mount the new engine in the frame, and begin assembling all of the subsystems around it. We've also been working hard at getting the suspension A-arms made. So far, we're at 6 of 8, and they're looking great!


Xavier has been leading the way with the electrics for the new car, and they have not only been looking at the PCB boards for the car, but also machining a lot of the mounting panels for the ECU, dash, and master switches. It's very easy to forget all of the small details that are needed to assemble a subsystem properly.
David has been busy machining away and making it rain aluminum, and everything is turning out beautifully. So far, he's successfully made the front two uprights along with all of the drivetrain parts, and he is going to be trying to tackle the rear uprights shortly.
We also made some progress on the new radiator for this year's car. After my personal independent study research, I believe I have enough data to feel confident in utilizing a smaller radiator for the competition car in order to reduce the overall weight of the cooling system and allow for a better packaged system. I needed to make some small modifications to the heat exchanger, but we're happy with how it turned out.
In other news, Xavier decided to try his luck at the Chai's Torture Challenge, where he had to consume 12 of the spiciest chicken wings known to mankind in under 15 minutes. Unfortunately, he only made it through 4 wings, but we all gave him an A for effort. The sauce is miserably spicy though.

Duke Motorsports is also hosting the SAE Carolinas event at a local highschool, Research Triangle Highschool, this Tuesday. Some of the universities that will be attending are USC, UNC-Charlotte, NC A&T, and Clemson, and these teams will be bringing their Formula SAE and Baja SAE cars to showcase. We will all have the opportunity to talk with the other teams, with engineers working in industry, and then have the opportunity to present the progress our teams have made so far this year. It should be a great event, and we're looking forward to it!
And finally, since the Duke-UNC game is this coming Wednesday, GO TO HELL CAROLINA, GO TO HELL!
 |
We recently finished the engine mounts for the new frame, and everything is starting to come together for the car.
 |
 |
| Engine mounts on the new frame |


Xavier has been leading the way with the electrics for the new car, and they have not only been looking at the PCB boards for the car, but also machining a lot of the mounting panels for the ECU, dash, and master switches. It's very easy to forget all of the small details that are needed to assemble a subsystem properly.
 |
| Under the magnifying glass |
 |
| But wait, he's an ECE...??? |
 | |||
| So happy for something so shiny |
We also tried our luck with the first round of making the carbon fiber aero package for the new car. We thought everything was going smoothly, but we soon realized that excessive vacuum causes the airfoils to crinkle and harden that way. We're currently researching different methods of applying the carbon fiber, epoxy, and vacuum to the foam airfoils, but we also want to focus on getting all of the other parts of the car done before worrying about the aero package.
 |
| Cutting the carbon fiber sections for the airfoils |
 |
| Laying up the carbon fiber |
 |
| New heat exchanger |

Duke Motorsports is also hosting the SAE Carolinas event at a local highschool, Research Triangle Highschool, this Tuesday. Some of the universities that will be attending are USC, UNC-Charlotte, NC A&T, and Clemson, and these teams will be bringing their Formula SAE and Baja SAE cars to showcase. We will all have the opportunity to talk with the other teams, with engineers working in industry, and then have the opportunity to present the progress our teams have made so far this year. It should be a great event, and we're looking forward to it!
And finally, since the Duke-UNC game is this coming Wednesday, GO TO HELL CAROLINA, GO TO HELL!
Sunday, January 20, 2013
Back in Action
Yesterday marked the second Saturday work-day of our semester, and we have definitely hit the ground running! There's something really nice about walking up to the garage and hearing every air tool and powered device creating parts for the new car: the sound of progress.
At the very beginning of the semester, I was invited to attend Maurice's final senior presentation on the fuel tank design for the new car. He did a fantastic job, touching on all of the key design points as well as showing all of the effort he put into creating the fuel tank. We consider ourselves lucky to have had the opportunity to have Maurice come by the garage and work with us, and we're definitely looking into developing a more concrete fellowship between engineering student groups and local high schools for the future.
Alright, well back to the car...So we had a slight mishap with the carbon fiber intake. Last semester, we put the intake together with a small amount of epoxy to seal it, and then applied carbon fiber on all of the seams waiting for the Spring to apply the final coat of epoxy and vacuum bag the entire assembly. Well, it was that time, and we also carbon fibered our wax runners to have a nearly finished air induction system.
Unfortunately, things did not go so well. As we were applying vacuum to the plenum/diffuser assembly (right in the pic above), the center of the plenum began to implode on itself, and after 24 hours under vacuum, the center of the plenum became too weak to potentially run on the car. Also, the diffuser developed a kink in its side while under vacuum, which basically means that the entire intake up until this point was garbage. Ooops.
Luckily the runners turned out alright, and we were able to successfully melt all of the wax from the carbon fiber outer casing. We've been hard at work getting the intake redone, making some small modifications to the design in order to avoid this issue in the future. The first change we made was in the brace by adding a vertical member to prevent any implosion at the center. The second major change is that we've switched up our epoxy of choice to Hysol, which is much stronger, but slightly heavier. I personally don't want to have to redo the intake again, so we're making sure to not cut any corners or potentially make a bad mistake.
We're also making a new diffuser/restrictor so that we can have a new intake system with the new epoxy.
So far, everything is going smoothly with the new intake design, and we're actually working on this during the week so that we don't intrude on all of the other work we need to do on Saturdays.
When we were looking at the frame, we noticed that there was a slight error in the rear, specifically with the location of a cross-brace and the x-brace located at the very back of the frame. The first Saturday back, we decided to jump right on that so that we could have the frame ready.


We had Justin chop away at the old tubing while we prepped the new frame tubes for fitment, and the end result turned out very well.
Yoshi was also hard at work preparing all of the A-arm suspension tubes with Emily, and they're almost at the point of welding. They bounced back and forth between the garage and the student machine shop, either working the tubes on the jig and the grind wheel or making inserts on the lathe.
Yesterday, we were also able to accomplish a big chunk of work as well. David, who's been hard at work machining the drivetrain and WHUBs components on the car, decided to work with Jackson on designing and manufacturing a new plate for the buttons and lights on the dash for the car (ignition, shift light, neutral light, etc.). For us taller drivers, our knees take a beating when driving the car because they ram into these mounting plates, but the new location should completely eliminate that.
Kevin was working on all of the steering component stuff, going through all of the SolidWorks, making a list of all of the components we will need, and checking inventory to see if we have enough material to make the entire system.
The last major goal we completed this weekend was to get the engine for our new car ready to go. This involved taking the flywheel and alternator assembly for an old motor and swapping it onto the new engine, as well as chopping off the rear mount. At first, I just thought that the engine was missing the alternator cover, but when I really looked into it, I saw that it was actually missing these key components. However, with a little bit of luck and the trusty repair manual, we were able to knock out the swap in under an hour.

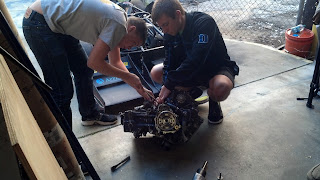
The removal of the stock rear engine mount was more of a stress release than anything else, but in the end, it turned out great.
That pretty much sums up the start of the semester for Duke Motorsports. On a side note, we pulled the tape off of the garage door, and it looks pretty sweet! We're still looking for some thick silver pinstripes to put over all of the lines and do some last minute touch-ups, but we're very happy with how it looks.
And Chef Yoshi came up with a new way of warming pizza up using the electrics heat gun. I can't say I tried it, but he seemed to be happy with how it tasted...
At the very beginning of the semester, I was invited to attend Maurice's final senior presentation on the fuel tank design for the new car. He did a fantastic job, touching on all of the key design points as well as showing all of the effort he put into creating the fuel tank. We consider ourselves lucky to have had the opportunity to have Maurice come by the garage and work with us, and we're definitely looking into developing a more concrete fellowship between engineering student groups and local high schools for the future.
 |
| Maurice giving his presentation |
Alright, well back to the car...So we had a slight mishap with the carbon fiber intake. Last semester, we put the intake together with a small amount of epoxy to seal it, and then applied carbon fiber on all of the seams waiting for the Spring to apply the final coat of epoxy and vacuum bag the entire assembly. Well, it was that time, and we also carbon fibered our wax runners to have a nearly finished air induction system.
 |
| Vacuum bagging the intake and runners |
 |
| Melting the wax from the runners |
 |
| New intake design |
 |
| Prepped diffuser/restrictor mold |
When we were looking at the frame, we noticed that there was a slight error in the rear, specifically with the location of a cross-brace and the x-brace located at the very back of the frame. The first Saturday back, we decided to jump right on that so that we could have the frame ready.


We had Justin chop away at the old tubing while we prepped the new frame tubes for fitment, and the end result turned out very well.
 |
| New rear of frame |

 |
| Suspension masters at work |
Yesterday, we were also able to accomplish a big chunk of work as well. David, who's been hard at work machining the drivetrain and WHUBs components on the car, decided to work with Jackson on designing and manufacturing a new plate for the buttons and lights on the dash for the car (ignition, shift light, neutral light, etc.). For us taller drivers, our knees take a beating when driving the car because they ram into these mounting plates, but the new location should completely eliminate that.
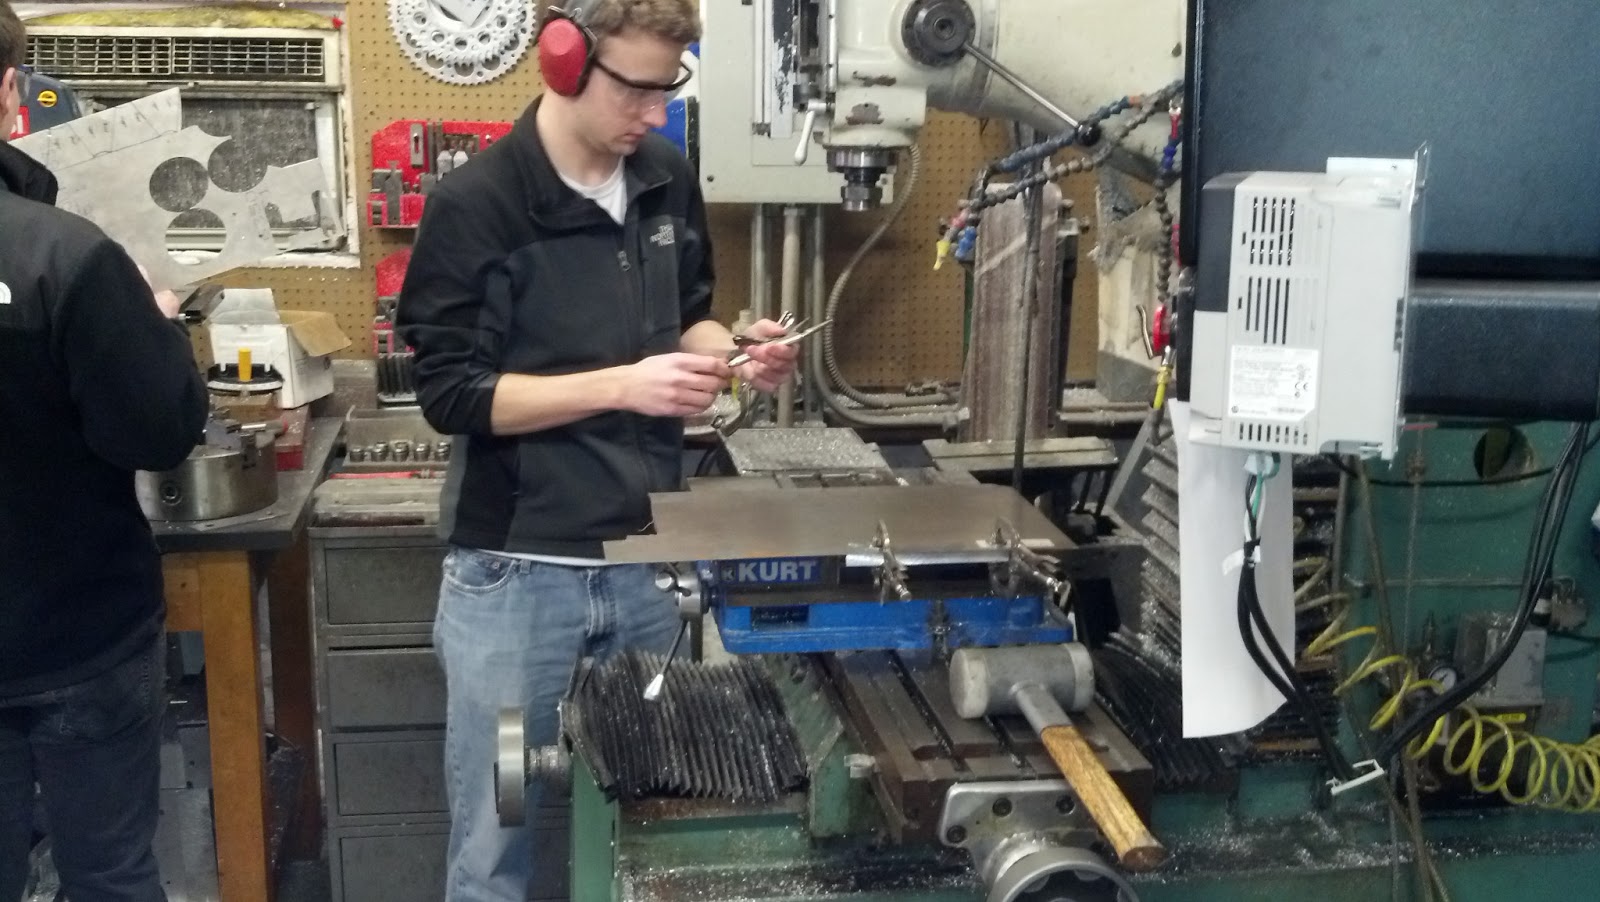 |
| Machining the plate |

 |
| Working the CAD |


The removal of the stock rear engine mount was more of a stress release than anything else, but in the end, it turned out great.
 |
| Chopping away |
 |
| Our garage door |
 |
| "Cooking" in the garage |
Subscribe to:
Posts (Atom)